
Quilted Christmas Table Runner Tutorial
This quilted Christmas table runner tutorial shows you how to make a wonderful decoration for the holidays.  With some lovely holiday themed cloth you can make this table runner. Finished size of this quilt is 15″ x 36″.
There are so many great Christmas fabric prints every year, but I find it always a shame to cut them into small pieces for quilting! This table runner allows you to choose and feature a large scale print.

The project is a quick sew and suitable for a beginner quilter. The larger center panel is bordered by pieced strips that are sewn from smaller scale prints. The completed size is 15″ x 36″, the perfect size for a coffee table or as part of a dining table center piece for your holiday dinners.

Materials
large scale print for center panel, 1 yard
3 smaller scale coordinates, 1/4 yard each
quilt batting, 1 yard
backing fabric, 1 yard
binding fabric, 1/4 yard
Sewing Essentials (pins, scissors, etc.)

Get the Free Sewing Pattern Below:
Quilted Christmas Table Runner Tutorial
Step 1 – Cut the Following:
 large scale print – 9 1/2″ x 30 1/2″
smaller scale coordinates – 1 1/2″ stripes by width of fabric, 3 of each fabric for 9 total
Step 2 – Make the Outer Boarder
 Sew 3 different strips together. Press seams to one side. Repeat with remaining strips.
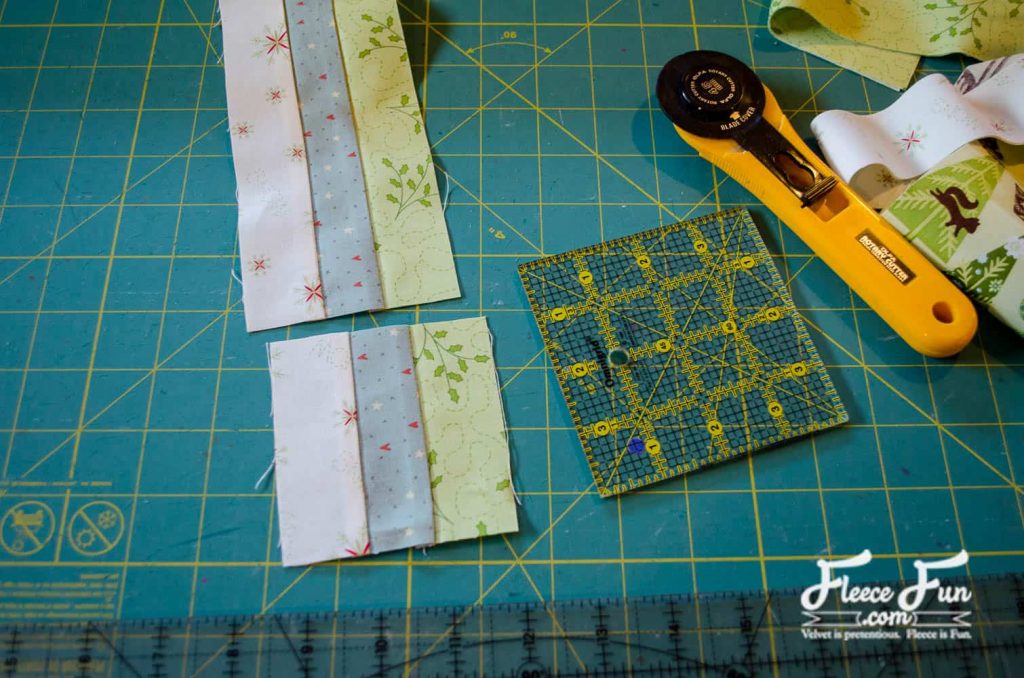
Cut into lengths of 3 1/2″. You will need 30 blocks in total.

Sew 3 blocks together.

Sew this row to one of the short ends of the panel.

Repeat with the other short end. Sew 12 squares together to form the rows for the sides. Attach them to the sides of the panel. Now your quilt top is complete.
Step 3 – Add the Backing
 To finished the quilt top, cut a backing that is 1-2″ larger than the quilt top on all 4 sides. Tape it to a hard surface with right side down. Spray the backing with adhesive.

Place a similar size piece of batting on top of the backing. Spray top of batting with adhesive.

Center your quilt top on the batting, right side up.

Quilt through all layers. You can use straight lines or free motion quilting. I did some free motion loops.

Trim the backing and batting to be even with the quilt top.
Step 4 – Make the Binding
 To create the binding, cut 3 strips 2.5″ wide by the width of the fabric. Join them together with a diagonal seam and press.

Press the long strip in half, lengthwise.
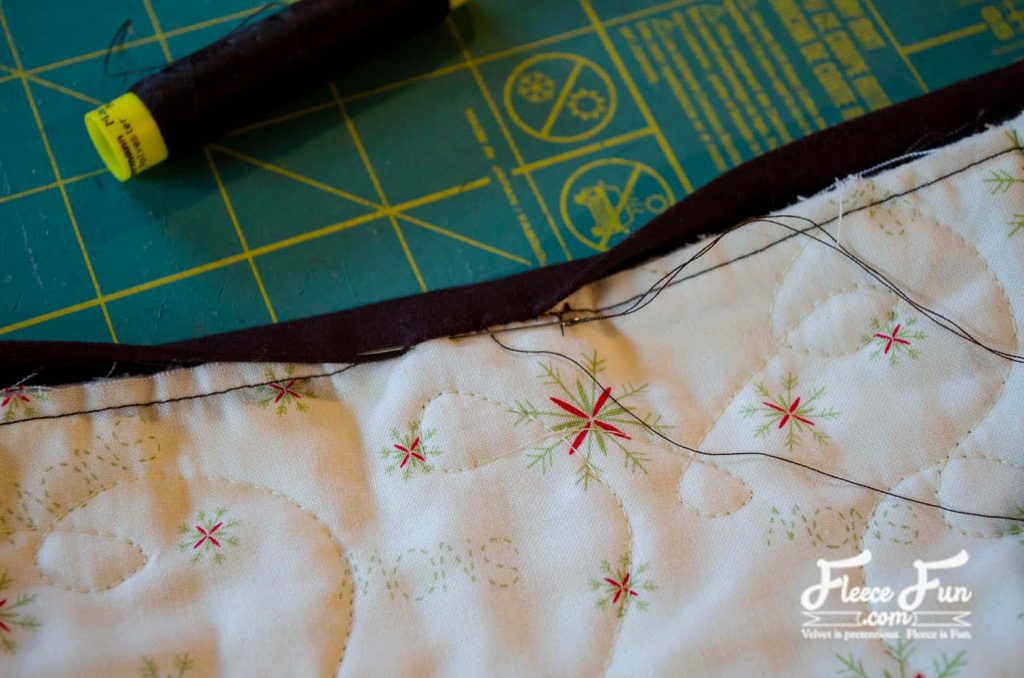
Sew binding to the right side of the quilt. Flip folded edge to the wrong side and hand sew it down.

Other Beginner Quilting Tutorials for you to enjoy:
- How to Make a Rag Quilt for Beginners
- Quilt As you Go, Stitch N Flip Quilt
- How to Sew a Quilt the Easy Way
- Easy Pinwheel Quilt Block
- Summer Table Topper Quilt Tutorial
- Quilted Christmas Table Topper Tutorial
More Christmas Ideas:
- DIY Mini Santa Hat Headband (Free pattern and SVG)
- How To Make An Advent Calendar Wreath
- Santa’s Spa homemade beauty products and printables
- Cute Christmas Stocking DIY
- No Sew Christmas Stocking DIY
- Noel Handmade Ornament
- Holiday Bath Bombs
- Christmas Tree Pillow
- Stocking Advent Calendar
- Little Elf Handmade Ornament
- Let it snow Handmade Ornament
- “Let us Sew” SVG File
- Deer Head Pillow
- Vintage Apron
- Joy to the World Printable
- Santa Hat DIY (FREE Pattern)
- You can See More Christmas Ideas here