
Santa Ornament DIY
This content contains affiliate links or sponsored elements, read our Disclosure Policy.

This cute Santa Ornament DIY is a great project for kids and adult during the holidays.  With a few simple materials you can make this cute ornament for your Christmas Tree.
You will need:For the Santa Belt Ornament
One round mini embroidery hoop
Acrylic Paint or Paint Pens:
Red
Gold
Black
Sealant Like Modpodge
Ornament Hook

Santa Ornament DIY Instructions
Step 1 – Prep the hoop

Make sure your flat embroidery faces are removed from the hoop part and clean ( wipe with a lint free rag).
Step 2 – Paint the Base

Paint or color the base in red ( if you want to make it elf like you can go with green). Allow the base to dry.
Step 3 – Add the Details
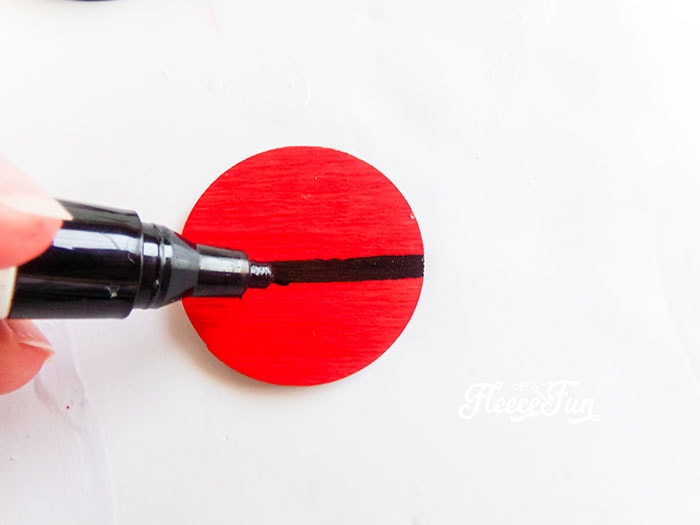
Start with the belt – draw a line across the ornament. Allow it to dry.
 Next add the belt buckle by drawing or painting a gold rectangle in the center of the belt.
 Add a few dots for buttons.

When all of the paint has dried completely, seal the painting. Allow the sealant to dry completely.
Step 4 – Finish the Ornament

Attach ornament hook and enjoy!
More DIY Christmas Ornaments:
- Felt Lanterns
- “Let It Snow” Hoop Ornament
- Felt Reindeer Ornament
- Felt Elf Ornament
- Noel Hoop Ornament
- Nutcracker Ornament DIY
- Mini Top Hat Ornament
- Crochet Angel Ornament
- Snow Man Ornament
- Cute Cloche Ornament (Shatterpoorf)
- You can see all of Handmade Ornament Tutorials on this page
- Joy Wooden Christmas Ornament